Monday, December 30, 2013

Eggless Tutti Fruitti Whole Wheat Milk Buns

The end of the year 2013, was a very difficult one for me. I was loaded with lots and lots of work at the office front. Also, my little S was down with fever due to season change and to top it all the hubby dearest had to be away for a couple of days because of sudden demise of a close relative. So, in a nutshell, it was chaos with a capital C. Finally, today I got up the strength to bake something nice before the 31st. These sweet milk buns can be had at any time of the day/night. They are easy to make and store well. Excellent finger-food for kids!


Without further ado, lets get to the recipe.

Ingredients:

Flour: 3 and a half cups
Whole Wheat flour: 3 cups
Active Dry Yeast: 1 tablespoon
Salt: 1 teaspoon
Milk: 2 cups
Sugar:1/4th cup
Oil/butter: 1/4th cup
Tutti fruit: a handful
For decoration:
Chocolate sauce: 3 tablespoons
Colored small candy: for sprinkling

Process:

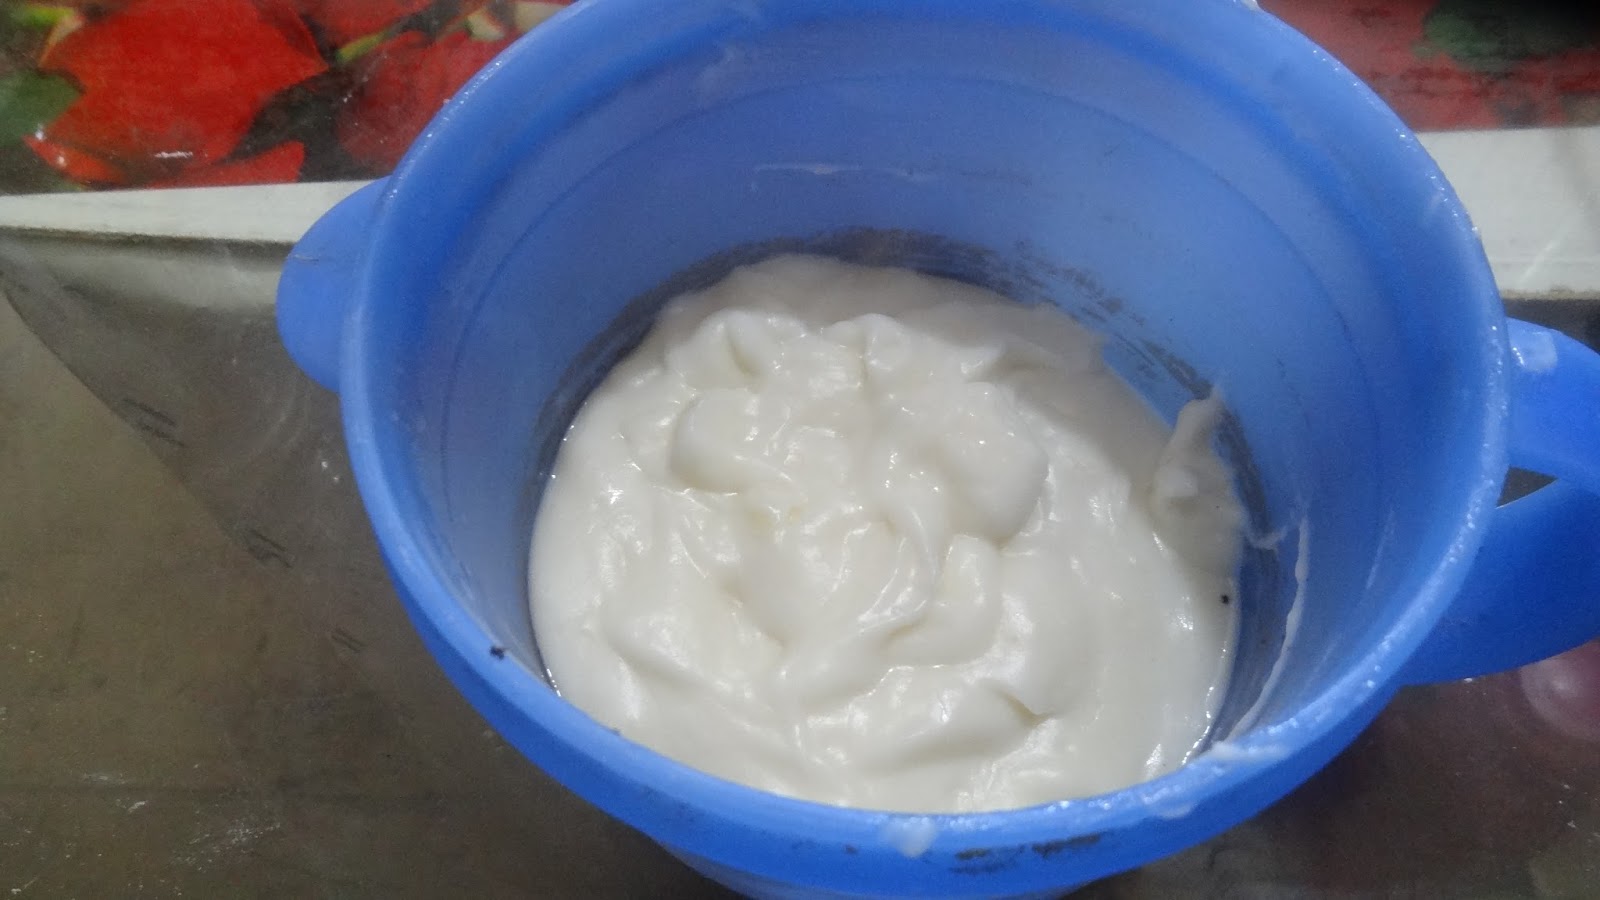
1. Take warm milk in a deep-bottom bowl. Add sugar to the milk. Sprinkle yeast on top.
2. Now add salt and mix once. Add the tutti frutti.
3. Now start adding flour and whole wheat flour alternately. You may need to add some more flour depending on the amount of moisture in the air.
4. Once the mixture forms a solid lump. Now add butter to this mixture. Keep kneading till you get a firm, smooth dough. Keep adding sprinkles of dry flour if the dough gets too sticky.
5. Grease a deep-bottom bowl and dunk the dough in it. Keep the bowl in a dry, warm place for one hour. In one hour, the dough will rise to double its size.
6. Now punch the dough and knead it once more. Divide the dough into small balls. Grease a cup-cake mold and place the balls into the molds.


 7. Keep the cupcake mold undisturbed for another 20 minutes. The balls of dough will appear puffed up.
8. Now preheat the oven to 200 degrees C. Bake the buns for 10 minutes.
9. Once the buns are done, grill the buns for 5 minutes in Grill mode.
10. Take the buns out of the oven. Brush with milk/butter.
11. Cool to room temperature. Pour a spoonful of chocolate sauce over each bun and sprinkle with coloured candies.

12. Serve and enjoy.
I am sending this recipe for the KFB Baking Palooza 2013. :-)


Wednesday, December 18, 2013

Childhood Ramblings....(and Caramel Candy in the Pressure Cooker)

(Source: Cakes and More!: Dulce de Leche)


I grew up in Chittaranjan Park, the "little Bengal" of New Delhi. The Market no. 2 of Chittaranjan Park was just a stone's throw from my house. The market that I remember was quite different from the pillared and modernized structure of today.

The market of yore comprised of merely seven or eight shops in a row. These shops were really small and old-fashioned. I was a frequent visitor of this market accompanying my Dadaji (whom I used to call Dadabhai).

Out of all the shops that we visited, one shop was the most my special favourite. This was a small, dark, shanty of an aged "press-wallah". He used to specialize in ironing coats and blazers. So, at the start of every winter Dadabhai and I used to descend at his store, armed with a huge load of winter clothes.

This old man (the shopkeeper) was frail, bent, and soft-spoken. Whenever he spoke there was always a twinkle in his eye. "Nanhi gudiya" he used to call me lovingly. I used to sit very comfortably on his old charpoy and dangle my legs to my heart's content while Dadabhai used to count the clothes and chat with him on all topics under the sun. When it was time to go, the old man used to always give me an orange toffee. The small orange toffees that were available for 50 paisa at that time. Oh! to my six-year-old self that orange toffee was no less than a treasure because I was not allowed to eat toffees at home! Looking back, I wonder that my grand-dad never stopped me from eating the sweets. In present times, I daresay, we parents will never let our children accept toffees from strangers for fear of the toffees being laced with toxic things! Different times, different people!


Toffees and children are inseparable! Though I am very strict on the number of toffees that my daughter consumes in a week, but in my heart of hearts I know how she longs for it. Hence, when I chanced upon the recipe of making caramel candy, I just went headlong into making it.

Since the Kolkata Food Bloggers group is turning one and there is a wonderful birthday party celebration, I am sending this beautiful dessert for the "Kolkata Food Bloggers' Birthday Celebration".


This version of caramel candy is called Dulce - de - leche. (pronounced Dool - say - de - leeshay).
It is so simple. One can make it simply by steaming a tin of condensed milk in a pressure cooker. I got the recipe from here.


Here is the recipe:

Ingredients:

Condensed milk (I used Amul Mithai mate): 1 tin
Water: Approx three cups. You would need enough water to make sure that the tin of condensed milk is half immersed in water.

Procedure:

1. Remove the plastic wrap of the condensed milk tin (if any). Do not open the metal flap of the tin.


2. Place it in the pressure cooker. Now add water till the tin is partially submerged in water. The water should come halfway up the sides of the tin as shown in the picture below.


3. Close the lid of the pressure cooker and cook on high heat till one whistle. (Do not worry. This is safe!)
4. Right after one whistle lower the heat to minimum and let it simmer on the gas for 20 minutes. Do not turn off the gas. The cooking time will vary according to your requirement. If you want a hard dense chewy caramel, cook for 25-30 minutes. I generally like a soft, creamy consistency, so I go for 20 minutes of cooking time.
5. Let the tin come to room temperature. This takes nearly an hour but believe me, it well worth the wait.
6. Once the tin has cooled completely, open the tin. Dig right in with the spoon. It is heavenly delicious! Needless to say, kids will love it.


Tuesday, December 3, 2013

Stuffed Caterpillar Buns

(Adapted from Caterpillar Bread by Fauzia's Kitchen Fun)

 
The days that little S has school, are governed by that million-dollar-question: "What do I put in her tiffin box?" You can imagine my annoyance when I open the box and find half-eaten food in it. (My face become red and steam comes out of my ears. :-))
 
I remember the words of a wonderful writer (mom and) grand mom "My grandchildren wont eat anything that has not danced on TV!" Left to her own devices, S would like to eat Maggi or Top Ramen every day of the week. Now I am not against her occasionally eating instant noodles, but sometimes it is good to eat healthy home-cooked food too. (Try explaining that to a 6 year old!) The poor child suffers from peer pressure. Her parents are not so "hep" because they want to give her rotis and paranthas for lunch.
 
While hunting around for interesting tiffin ideas, I got this wonderful recipe of caterpillar shaped bun from here.


These buns are easy to make, and I can experiment with any number of fillings. Home made, preservative-free, portable, and they look cute too!
 
In this recipe I have used spicy chicken kheema filling. Alternatively, paneer bhurjee or even some leftover sabzi can be used as a stuffing.
 
Here is how I made it:


Ingredients:

For the filling:
Chicken kheema - 250 grams
Onions - 2 (ground to paste)
Ginger-garlic paste - 1 teaspoon
Graram masala powder - 1/2 teaspoon
Red chilli powder - 1/4 teaspoon (more can used if you want it to be more spicy)
Tomato - 1 large, chopped
Turmeric - 1/4th teaspoon
Oil or butter - 2 tablespoon
Amchur powder/lemon juice - 1 teaspoon
Coriander leaves (chopped) - 2 tablespoon
Potato (chopped into small pieces and fried) - 1 (optional)
 
For the bread base:
I used the bread dough that I make at home. You can get the recipe here.

Egg wash:
Egg - 1 (Beaten and mixed with 1/2 cup water)

Process:

Preparing the filling:
 
1. First heat oil/butter in a pan. Add the onion paste and ginger-garlic paste. Fry for a few minutes. Add the tomatoes, turmeric, and red chili powder. Stir fry till oil separates.
2. Next add the chicken kheema. You can steam the chicken keema beforehand to reduce cooking time but I generally avoid this step.
3. Stir fry add in pan till the meat starts changing colour. Add garam masala powder. Sprinkle some water on top of the meat to prevent the meat from sticking to the pan. |Continue to stir fry over medium flame. When the meat takes up a darkish colour, add some water. The amount of water should not be too much. The meat should not be immersed in the gravy.
4. Cover the pan and let it simmer for 5-7 minutes. Open the cover. The water will have dried up. Stri fry for 1-2 minutes till the kheema filling is completely dry. Add the lemon juice and mix. Garnish with chopped coriander and leave aside to cool.

Stuffing the buns:

1. Take a round disc of the bread dough. Roll it into a roti. While rolling the roti, do not use any dry flour. Rather use oil/butter to roll the disc and prevent sticking.


2. Brush one end of the roti with egg wash.


3. Add the filling at one end of the roti.


4. Roll the outer flap of the roti and cover filling with the roti. Slightly press it down with the fingers.


5. With a knife, give longitudinal cuts in the remaining roti as shown in the picture:


6. Roll the roti in form of a roll. Add two cloves in form of eyes.


7. Brush with egg wash.


Baking the buns:

1. Pre-heat the oven to 200 degrees C for ten minutes.

2. Bake in a pre-heated oven for 15 minutes. Set the oven to Grill mode. Grill for 5 minutes at the same temperature.


3. Cool to room temperature. Serve and enjoy!


Saturday, November 30, 2013

Easy No-Bake Eggless Cheesecake

(Adapted from Steve's Kitchen - Cheesecake Recipe - No Bake)

 
This post is a sequel to my first one about New York Style Baked cheesecake. Cheesecake is a versatile dessert that be prepared very easily at home...without any baking!
 
While hunting around for no-bake cheesecake recipes, I stumbled upon this wonderful video. You can take a look here.
 
Non-bake cheesecake is a recipe that you can make without any cooking per se. Mainly it needs to be chilled in the refrigerator and serve chilled once it is set. In this sweltering heat, it is simply perfect! So, without further ado, let me jump right in to the recipe:


Ingredients:

 
For the biscuit base:
 
Arrowroot or digestive biscuits: 10-12
Butter: 3 tablespoons
Sugar: 3 tablespoons
 
For the cheese topping:
 
Home-made paneer - made from 1.5 liters of toned milk
Whipped cream - 1 cup
Sugar - 3/4th cup
Juice of one lemon
Zest of Lime - 1 pinch
Vanilla Essence - 1 tablespoon
Yoghurt - 6 tablespoons
Gelatin - 3 and a 1/2 teaspoon
 
For decoration:
3 tablespoon of Mango Jam
 

Process:

1. First to prepare the biscuit base, crush the biscuits with your hands. Then dry grind them into a fine powder in a food processor. The biscuit mix will look something like this:


 2. Now pour the biscuit base into a plate. Mix butter and 3 tablespoon sugar with this mixture.
\


 3. Mix well with your hands and make a layer of this mixture at the bottom of the springform pan. Make sure you press some of this mixture to the sides of the pan so that it forms a strong base for the cheese topping.


4. Keep the pan in the refrigerator for at least 2 hours to set.
5. To prepare the cheese topping, add the paneer, yoghurt, sugar, vanilla, and lemon juice to the food processor bowl.
6. To get lemon zest just grate a whole lemon using a hand grater. You will get snips of lemon peel. Add a pinch of this grated lemon peel to this mixture.


Grating the lemon


7. Now make a smooth paste of this mixture after adding the whipped cream. You will get a thick batter, slightly more runny than a cake batter.

8. Mix gelatin with 2 tablespoon of water at normal room temperature. (Vegetarians can substitute gelatin with china grass or Agar Agar). In a few minutes the gelatin will bloom and look like this:


9. Now place the gelatin in a water bath. Stir slowly till the gelatin dissolves into a clear liquid. Do not let the gelatin boil.


10. Mix the gelatin thoroughly with the cheese mixture. Pour the cheese mixture over the biscuit base.


8. Now place the pan in the fridge. Keep it overnight for the cheesecake to set.
9. In the morning, take out the cheesecake from the fridge. The top surface will be firm to touch.

10. To prepare the topping take 3 tablespoons of mango jam in a pan. Add 1/3rd cup of water and let the mixture simmer over low flame. The jam will melt and get mixed evenly to form a smooth jelly. Cool this jelly and pour it over the cheesecake. Place the cheesecake in the fridge for another 10 minutes.
11. Voila! The cheesecake is ready. Slice and serve. (It was a superhit with my little one. She devoured her cheesecake slice in no time!)


I am sending the recipe to the Kolkata Food Bloggers online event: Beat the Heat.


Wednesday, November 27, 2013

New York Style Baked Cheesecake

(Adapted from Foodnetwork.co.uk: New York Style Cheesecake Adapted for India)


I have always wanted to bake a cheesecake. Even after baking a number of cakes, the cheesecake remained a elusive dream for me just because I did not have a springform baking pan. Now, a cheesecake is a delicate thing and it cannot be baked in a regular baking pan for the simple reason that is difficult to demould. A springform baking pan has a removable structure. You can remove the upper portion whereas the cake can sit pretty on the base of the pan. Sort of like this:


Two days back, hubby got me a springform baking pan and all my secret desires of baking a cheesecake just kicked in!

The cheesecake is made entirely of cream cheese. If you do not get cream cheese easily, you can substitute it with home-made paneer. Of course, if you are using store-made paneer, just crumble it with your hands.

I got a very good recipe adapted to Indian taste from here.

Here is how I made it:

Ingredients:

(My cake pan is 8 inches in diameter. So the ingredients are given as per the size of the pan.)

For the biscuit base:

Digestive or arrowroot biscuits: 10-12
Granulated sugar: 3 tablespoons
Butter: 3 tablespoons

For the cheese topping:

Paneer - 500 grams
Yoghurt - 6 tablespoons
Vanilla essence - 1 tablespoon
Eggs - 3
Sugar - 3/4th cup
Flour - 2 tablespoons
Jam - 5 teaspoons ( I used Kissan Mixed Fruit jam)

Process:

1. To prepare the biscuit base, crumble the arrowroot or digestive biscuits. Dry grind the biscuits in a food processor to get a fine powder.
2. Mix the butter and 3 tablespoon sugar with the biscuit powder. Spread evenly at the base of the greased cake pan to form a layer about 1/2 inch thick. Pre-heat the oven to 150 degrees C for 10 minutes.
3. Place the cake pan in the pre-heated oven and bake for 10 minutes till biscuit base is firm to touch. Keep aside to cool.
4. Next, prepare the cheese topping. In a food processor, mix together paneer, yoghurt, vanilla, flour, and sugar. Mix well. If required, push the mix down with a spatula in between.
5. Add eggs one by one. Whisk well. You will get a smooth white mixture, slightly more runny as compared to cake batter. Pre-heat the oven once again to 150 degrees C.
6. Now pour the mixture over biscuit base and bake for 40-45 minutes till the center of the cheesecake is firm.
7. Remove from the oven and cool to room temperature.
Just out of the oven!


8. Dot the surface with jam.


9. Chill in the refrigerator overnight. Next morning remove the cheesecake from the fridge. Cut into wedges and serve. Enjoy!


Friday, September 13, 2013

Healthy Eggless Wholewheat Cupcakes in the Microwave

(Adapted from Amuthi's Kitchen - South Indian Recipes)


Have been missing in action for some time. Sometimes life gets so hectic, that I just don't seem to find time to do the things I love.

Anyway, managed to squeeze out some time for this post. This time I decided to post an eggless recipe. My dad is allergic to eggs. Also my dad-in-law cant eat eggs because of some health-related issues. So, whenever there is any celebration in the house, I am called upon to whip up an eggless cake so that both my dads can also enjoy sampling a piece of cake.

While hunting around for a healthier version of the basic vanilla cake on the internet, I came upon this recipe here. Just loved the simplicity of this recipe. The recipe uses a minimum of ingredients that we usually have at home and it uses 100% whole wheat (Atta).
If made with Sugarfree Natura powder, this recipe will be safe for diabetics as well.

As a rule I mostly bake in my oven. But for these cup-cakes, I decided to try baking in a microwave (without the convection mode).

One word of caution though, this cake is a bit dense. It will not be as fluffy and airy as a cake made with Maida. But for all that it is real soft and spongy. My little daughter loved it!

Today is also my Dad's birthday, so I am posting his favorite cake recipe.

This is how I made it:

Ingredients:

Whole wheat flour (Atta) - 1 and 1/2 cup (I used Pillsbury Chakki Fresh Atta.)
Sugar (or Sugarfree Natura powder) - 3/4 cup
Baking powder - 2 heaped teaspoons
Vanilla essence - 1 teaspoon
Oil - 6 tablespoons
Water - 1 cup + 2 tablespoons


For decoration:

Pink edible color (optional)
Chopped cashew nuts - 3 to 4
 

Procedure:

1. Sift whole wheat flour and baking powder together.


2. Now mix all the wet ingredients in another bowl.
3. Add sugar to the dry whole wheat mixture.


4. Add the wet mixture to the dry mixture. Beat the mixture well till all the ingredients are mixed thoroughly. I added a few drops of edible pink color that is completely optional. If you feel that the batter is too thick add 2 tablespoon of water additionally. The batter will be thick but free-flowing.


5. Pre-heat the microwave for 30 seconds on 100% (High) power.
6. Pour the batter in cupcake molds. (I use my microwave-safe silicone molds.) Remember to fill 3/4th of the molds so that the cakes will get space to expand. Add a sliver of chopped cashew nut on top of each cupcake.


7. Now bake in the microwave for 3 minutes on 100% (High). Let the cupcakes remain within the microwave for 5 minutes more (standing time) with the microwave turned off. Now take the cupcakes out of the microwave. The cupcakes will be soft but springy to touch. In case you feel that the cupcakes are not done yet bake for an additional 30 seconds on High power.
 
8. Cool the cupcakes and de-mold them. Serve with love.


Tuesday, August 27, 2013

Spicy Chicken Meatloaf: Indian Style

(Adapted from Specialty Recipes from Mye Kitchen)

One of my good friends S has requested me several times to put up this recipe. It was sheer laziness that made me dilly-dally for so long.

Chicken meatloaf is basically a continental dish. However, I am not a die-hard fan of continental food. I find continental dishes a tad too bland to suit my palate. Hence, I was looking for a indianized version.

Finally, I found a real Indian version of the same here.

Here is how I made it:

Ingredients:

Chicken keema /minced chicken - 500 grams
Green chillies (minced) - 2
Fried cashewnuts - 25 (I did not have cashewnuts so I avoided this ingredient.)
Red chilli powder - 1 teaspoon
Turmeric powder - 1/4th teaspoon
Salt to taste
Oil (as per requirement)
Eggs beaten - 1
1 egg (for egg wash) - optional

Masala paste:

Onion - medium - 1
Ginger minced - 2"
Garlic - 6 cloves
Shredded coconut - 1/4th cup (I used coconut milk powder.)
Cumin/Whole Jeera - 1 teaspoon
Fennel/Saunf - 2 teaspoon
Cloves - 4
Green Cardamom - 1
Cinnamon stick - 1"


Procedure:

1. Grind all the ingredients of the masala paste to a fine paste in the mixer.


2.In a deep bottom bowl, mix all the ingredients and the masala paste. Mix well. Keep this mixture covered in the fridge for an hour.


3. Grease a loaf pan with oil. Pre-heat oven to 200 degrees C. You need to ensure that the meat is packed loosely so that it cooks well. Brush the top lightly with egg-wash or oil.


4. Place the loaf pan in the middle rack of the oven and bake for 30 minutes.

5. Next, set the Grill option for 10 minutes. This will give the meatloaf a wonderful golden-brown color.

6. Take the meatloaf out of the oven. Serve hot!


Saturday, August 24, 2013

Hokkaido Milk Bread

(Adapted from Hokkaido Milk Bread Recipe: Edible Garden)

Till date I have baked several loaves of bread. This bread was by far the softest bread with a subtle sweet taste. One slice of this wonder bread and you will definitely fall in love with it.

Hokkaido milk bread recipe was developed by a Chinese lady called Yvonne Chen. The recipe involves making a starter for the dough using flour and milk. This starter is called Tangzhong. Once this starter has been made, it is one of the main ingredients of the bread dough. The Tangzhong activates the yeast further and makes the bread r-e-a-l-l-y soft.

I got this recipe from the super-talented Nags' blog here.

For making Tangzhong:

Ingredients:

Maida: 1/3rd cup
Milk: 1/2 cup
Water: 1/2 cup

Process (for making Tangzhong)

1. For making the Tangzhong mix the Maida with the milk and water in a pan. Add the Maida gradually so that lumps do not form.
Maida with the milk-and-water mixture


After mixing


 2. Next, heat this mixture on medium heat. Make sure you keep stirring the mixture gently so that lumps do not form.
3. After some time you will notice that the mixture has thickened and when you stir you can see concentric lines forming.


4. Take the mixture off the heat. Cool to room temperature. You can use this starter only after 2-3 hours of making it. In case, you plan to prepare the bread dough later, refrigerate the Tangzhong after cooling. This starter keeps well for 2 days in the fridge.


For preparing the bread dough:

Ingredients:

Maida: 2.5 or 3 cups
Sugar: 3 tablespoons
Salt: 1 teaspoon
Active dry yeast: 2 teaspoons
Milk powder: 2 tablespoons
Milk: 1/2 cup
Cream (or milk): 1/8th cup
Tangzhong: 1/3rd cup
Butter: 2 tablespoon

Process (for making bread dough):

1. Add Maida to a deep-bottom bowl.


2. Now add the yeast to this mixture.


3. Add sugar.


4. Add salt. Next add milk powder/dairy whitener. I used Amulya milk powder.
 

5. Next add half of the Tangzhong mixture. Also, add milk. 


6. Now its time to knead the dough. This is a r-e-a-l-l-y sticky dough, so you need to knead patiently, if kneading by hand. I used the dough hook attachment on my stand mixer to knead.


 7. Once the dough forms into a shaggy ball, place it on the working surface and start kneading by hand. You cannot add any extra flour while kneading this dough. Adding extra Maida will spoil this dough.  Instead I kept adding butter (as mentioned in the Ingredients) gradually while kneading.
5. After about 10 minutes of kneading, your dough is ready. To test whether the dough is really ready or not, pinch a section of the dough and pull it upwards. The dough will stretch in a thin membrane and a circular hole will form as shown in the image. If the hole is not circular, your dough is still not ready.

6. Grease a deep-bottom bowl and dunk the dough ball inside it.
7. Cover and keep undisturbed for an hour.
8. After an hour, the dough will have doubled in size. Now, divide the dough in six equal balls. Take one ball and using the rolling pin, roll it into a chapatti about 1/4th inch thick. My chapatti is not exactly round! :)

9. Now fold two ends of the chapatti on one top of the other as shown in the image.


10. Fold the dough into a roll as shown in the image.


11. Make five more rolls and place them side by side in the bread tin. (If you have more dough make more rolls). Cover and let it rise once again for 45 minutes. Pre-heat the oven to 180 degrees C for 10 minutes. Brush the dough will milk and bake in the oven for 30 minutes.

12. After 30 minutes, grill the bread for 5 minutes using the Grill option. Take the bread out of the oven. Your gorgeous milk bread is ready.


13. I also brushed the loaf with milk after taking it out of the oven. Super-soft, delicious milk bread.


Do write in and tell me if you liked this recipe. Your comments are always welcome!

I am sending this recipe to the Kolkata Food Bloggers event, "Yeasty - Feasty" a.k.a Bread Basket.