Tuesday, August 27, 2013

Spicy Chicken Meatloaf: Indian Style

(Adapted from Specialty Recipes from Mye Kitchen)

One of my good friends S has requested me several times to put up this recipe. It was sheer laziness that made me dilly-dally for so long.

Chicken meatloaf is basically a continental dish. However, I am not a die-hard fan of continental food. I find continental dishes a tad too bland to suit my palate. Hence, I was looking for a indianized version.

Finally, I found a real Indian version of the same here.

Here is how I made it:

Ingredients:

Chicken keema /minced chicken - 500 grams
Green chillies (minced) - 2
Fried cashewnuts - 25 (I did not have cashewnuts so I avoided this ingredient.)
Red chilli powder - 1 teaspoon
Turmeric powder - 1/4th teaspoon
Salt to taste
Oil (as per requirement)
Eggs beaten - 1
1 egg (for egg wash) - optional

Masala paste:

Onion - medium - 1
Ginger minced - 2"
Garlic - 6 cloves
Shredded coconut - 1/4th cup (I used coconut milk powder.)
Cumin/Whole Jeera - 1 teaspoon
Fennel/Saunf - 2 teaspoon
Cloves - 4
Green Cardamom - 1
Cinnamon stick - 1"


Procedure:

1. Grind all the ingredients of the masala paste to a fine paste in the mixer.


2.In a deep bottom bowl, mix all the ingredients and the masala paste. Mix well. Keep this mixture covered in the fridge for an hour.


3. Grease a loaf pan with oil. Pre-heat oven to 200 degrees C. You need to ensure that the meat is packed loosely so that it cooks well. Brush the top lightly with egg-wash or oil.


4. Place the loaf pan in the middle rack of the oven and bake for 30 minutes.

5. Next, set the Grill option for 10 minutes. This will give the meatloaf a wonderful golden-brown color.

6. Take the meatloaf out of the oven. Serve hot!


Saturday, August 24, 2013

Hokkaido Milk Bread

(Adapted from Hokkaido Milk Bread Recipe: Edible Garden)

Till date I have baked several loaves of bread. This bread was by far the softest bread with a subtle sweet taste. One slice of this wonder bread and you will definitely fall in love with it.

Hokkaido milk bread recipe was developed by a Chinese lady called Yvonne Chen. The recipe involves making a starter for the dough using flour and milk. This starter is called Tangzhong. Once this starter has been made, it is one of the main ingredients of the bread dough. The Tangzhong activates the yeast further and makes the bread r-e-a-l-l-y soft.

I got this recipe from the super-talented Nags' blog here.

For making Tangzhong:

Ingredients:

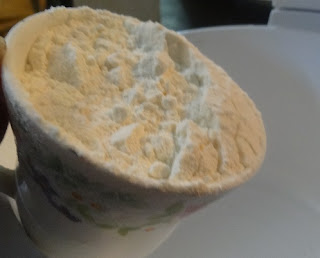
Maida: 1/3rd cup
Milk: 1/2 cup
Water: 1/2 cup

Process (for making Tangzhong)

1. For making the Tangzhong mix the Maida with the milk and water in a pan. Add the Maida gradually so that lumps do not form.
Maida with the milk-and-water mixture


After mixing


 2. Next, heat this mixture on medium heat. Make sure you keep stirring the mixture gently so that lumps do not form.
3. After some time you will notice that the mixture has thickened and when you stir you can see concentric lines forming.


4. Take the mixture off the heat. Cool to room temperature. You can use this starter only after 2-3 hours of making it. In case, you plan to prepare the bread dough later, refrigerate the Tangzhong after cooling. This starter keeps well for 2 days in the fridge.


For preparing the bread dough:

Ingredients:

Maida: 2.5 or 3 cups
Sugar: 3 tablespoons
Salt: 1 teaspoon
Active dry yeast: 2 teaspoons
Milk powder: 2 tablespoons
Milk: 1/2 cup
Cream (or milk): 1/8th cup
Tangzhong: 1/3rd cup
Butter: 2 tablespoon

Process (for making bread dough):

1. Add Maida to a deep-bottom bowl.


2. Now add the yeast to this mixture.


3. Add sugar.


4. Add salt. Next add milk powder/dairy whitener. I used Amulya milk powder.
 

5. Next add half of the Tangzhong mixture. Also, add milk. 


6. Now its time to knead the dough. This is a r-e-a-l-l-y sticky dough, so you need to knead patiently, if kneading by hand. I used the dough hook attachment on my stand mixer to knead.


 7. Once the dough forms into a shaggy ball, place it on the working surface and start kneading by hand. You cannot add any extra flour while kneading this dough. Adding extra Maida will spoil this dough.  Instead I kept adding butter (as mentioned in the Ingredients) gradually while kneading.
5. After about 10 minutes of kneading, your dough is ready. To test whether the dough is really ready or not, pinch a section of the dough and pull it upwards. The dough will stretch in a thin membrane and a circular hole will form as shown in the image. If the hole is not circular, your dough is still not ready.

6. Grease a deep-bottom bowl and dunk the dough ball inside it.
7. Cover and keep undisturbed for an hour.
8. After an hour, the dough will have doubled in size. Now, divide the dough in six equal balls. Take one ball and using the rolling pin, roll it into a chapatti about 1/4th inch thick. My chapatti is not exactly round! :)

9. Now fold two ends of the chapatti on one top of the other as shown in the image.


10. Fold the dough into a roll as shown in the image.


11. Make five more rolls and place them side by side in the bread tin. (If you have more dough make more rolls). Cover and let it rise once again for 45 minutes. Pre-heat the oven to 180 degrees C for 10 minutes. Brush the dough will milk and bake in the oven for 30 minutes.

12. After 30 minutes, grill the bread for 5 minutes using the Grill option. Take the bread out of the oven. Your gorgeous milk bread is ready.


13. I also brushed the loaf with milk after taking it out of the oven. Super-soft, delicious milk bread.


Do write in and tell me if you liked this recipe. Your comments are always welcome!

I am sending this recipe to the Kolkata Food Bloggers event, "Yeasty - Feasty" a.k.a Bread Basket.


Friday, August 2, 2013

Delightfully Crusty Banana Cake

(Adapted from Edible Garden: The Best Banana Cake Recipe Ever!)

My little S, the husband man, and I are fruit lovers. Bananas are a staple in our house; to be had with cereal or as a quick snack. However, often this is what happens to them:


This is the time we generally chuck them into the dustbin. Recently I came across a wonderful recipe for using over-ripe bananas on Edible Garden. I simply loved this recipe. To use these bananas and make a crusty, dense sweet treat seemed like an excellent idea. I just altered the recipe slightly to suit my requirements. Here is the recipe:


How I made it:

Ingredients

Maida (All purpose flour) - 1 and a half cups
Sugar - 1 cup
Banana - 1
Baking powder - 2 level teaspoon
Baking soda - 1/2 teaspoon
Vanilla essence - 1 full teaspoon
Buttermilk or curd - 1/2 cup
Eggs - 2
Oil/ Butter - 1/4th cup

For decoration:

Icing sugar - 2 tablespoon

Procedure

1. First peel the banana and mash the banana in the electric mixer. I used only one banana. (If you use two bananas, use only 3/4 cup sugar.)

Although you can mash these by hand but it is better to use the mixer to avoid mess.


2. Add 2 eggs to this mixture and whisk well in the electric mixer.

Add eggs


3. Now add sugar and mix well.


4. This is what the mixture looks like:


5. Add oil or butter. Though I have used oil, but butter is more suitable for this cake.


6. Add half cup of curd to this mixture.


7. Add vanilla essence to the mixture.


8. Now add baking powder.


9. Next comes the baking soda.


10. Start adding the Maida gradually to the mix.


11. Once you get a thick batter without any lumps, your mix is ready.


12. I added a few drops of blue food color to the batter. This step is purely optional.

13. Grease the baking pan. I used a square brownie pan.

14. Pour the batter into the greased pan.

15. Pre-heat the oven to 180 degrees C. Place the cake pan in the middle rack. Bake for 40 minutes.

16. After 40 minutes, I removed the cake from the oven. But on inserting the toothpick in the cake, it was still a bit dense. So I covered the cake pan with aluminum foil and baked for another 10 minutes.
(For those baking in a pressure cooker, follow the same instructions. Place the cake pan containing batter in the pre-heated pressure cooker with a bed of salt. Attach the lid of the pressure cooker minus the weight and keep on low flame for about 45 minutes or until an inserted toothpick comes out dry. This cake is a bit dense.)
17. On removing the cake from the oven. this is what the cake looked like:

18. Cool and de-mold the cake from the tin.

For decorating:

Take some icing sugar in a tea-strainer and sprinkle lightly on the cake.
I intended to decorate using chocolate chips, but we just could not resist this spongy and aromatic cake anymore. The cake disappeared in minutes!
Have a slice!